1. Enable legacy advanced boot menu
- Restart your computer and insert a Windows 10 bootable media into the optical media drive. Find out how to create a bootable media)
- On the displayed Windows Setup box, click Next.
- On the next page, click on Repair your computer.
- On the Choose an option screen, click Troubleshoot.
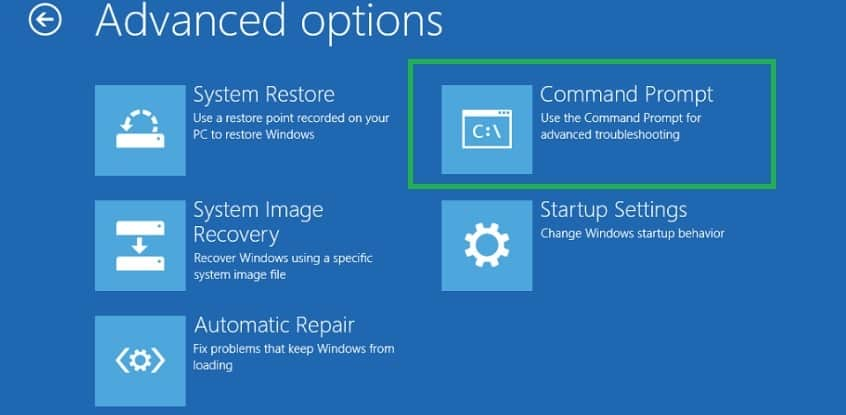
- Click on Advanced options.
- Now select Command Prompt.
- On the newly opened Command Prompt window, type C: and hit Enter.
- Type the following command and press Enter to enable legacy advanced boot menu:
BCDEDIT /SET {DEFAULT} BOOTMENUPOLICY LEGACY - Once the command executes successfully, type EXIT to close the Command Prompt window.
- Go back to the Choose an option screen, click Continue and start your computer normally.
3. Use System File Checker and Memory Diagnostic
➡ Restart your PC from the Boot menu
- Tap on Troubleshoot.
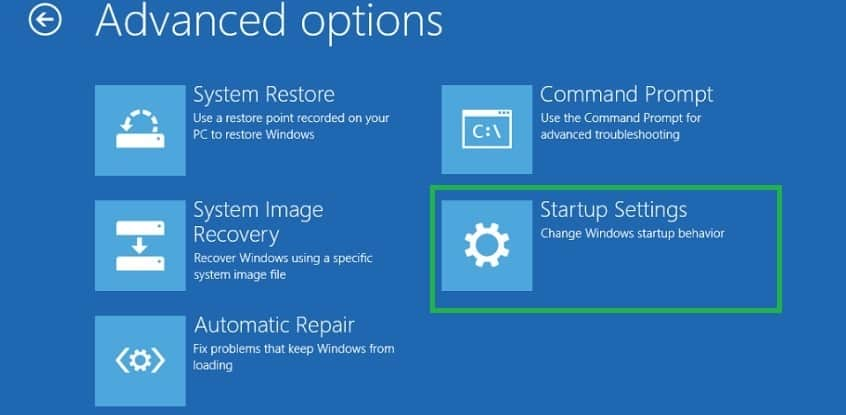
- Go to Advanced Options.
- Click on Startup Settings.
- Click the Restart button located on the lower right side of the screen.
- Your operating system should boot with the minimum system requirements.
Run the Windows Memory Diagnostic tool
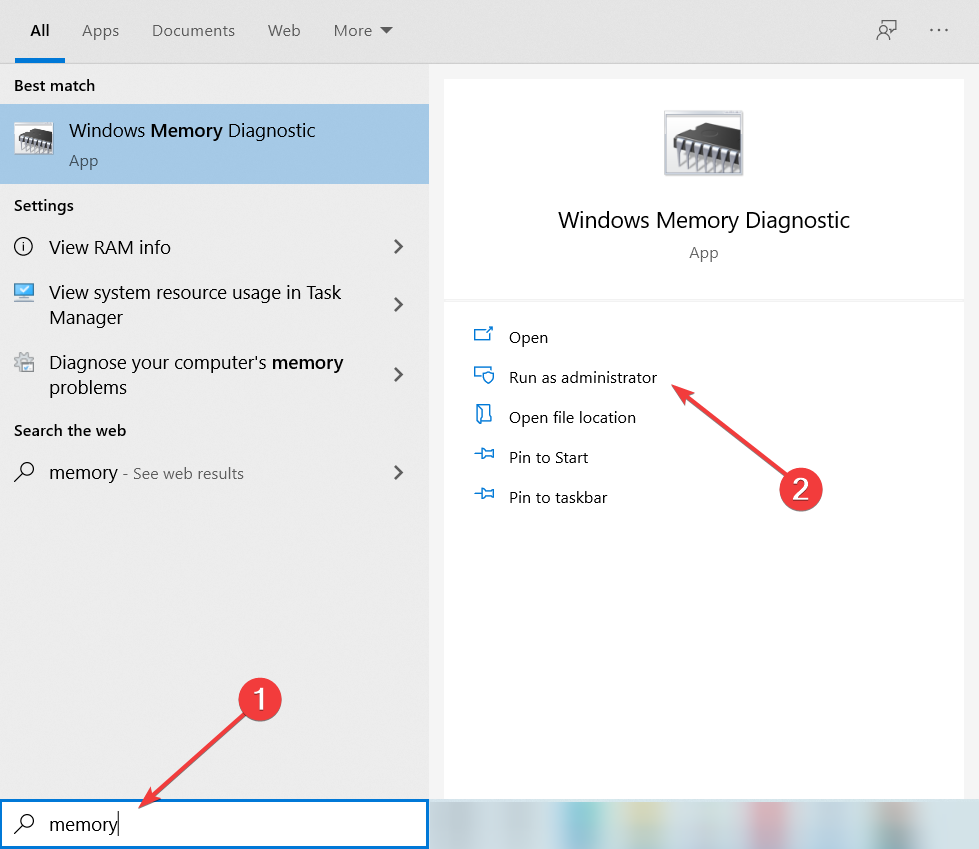
- Click on the Search button in your taskbar.
- Type memory, and select Run as administrator under the Windows Memory Diagnostic option.
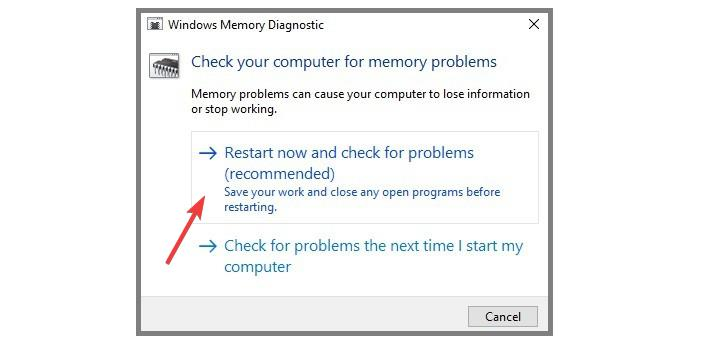
- Select Restart now and check for problems.
- After the reboot, the OS will automatically check your RAM and display the possible reasons as to why you got the Blue Screen of Death error.
- Reboot your PC normally.
- Check to see if the Kernel Security Check Failure BSOD error persists.
last update driver and the install updates.


