Once you get to the login screen, hit the Shift key 5 times, and you’ll see an administrator mode command prompt.
Now to reset the password—just type the following command, replacing the username and password with the combination you want:
net user geek MyNewPassword
That’s all there is to it. Now you can login.
Of course, you’ll probably want to put the original sethc.exe file back, which you can do by rebooting into the installation CD, opening the command prompt, and copying the c:\sethc.exe file back to c:\windows\system32\sethc.exe.
Reset Password with Command Prompt in Safe Mode
Windows 7 and earlier versions have a built-in hidden Administrator account which has no password by default. After forgetting the password to your regular account, you can access the built-in Administrator account in Safe Mode, and then reset your forgotten password with Command Prompt.
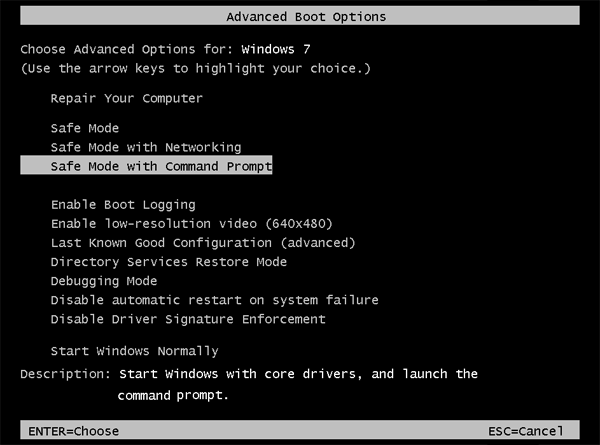
While starting the computer, hold down the F8 key until the Advanced Boot Options screen appears. Using the arrow keys to select "Safe Mode with Command Prompt" and press Enter.
You will see the hidden Administrator account available on the login screen. Once logging in, the system will automatically launch the Command Prompt with admin rights.
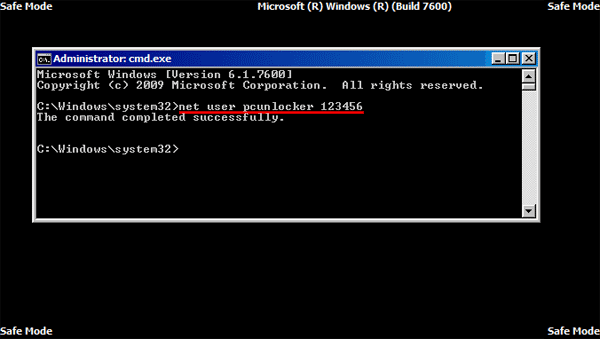
Run the following command and you can reset forgotten Windows 7 password in no time.
net user username new_password
Note that this method doesn't work if the hidden Administrator account is disabled.
Reset Windows 7 Password Using the Utilman.exe Trick
This trick based on the substitution of the Utility Manager (Utilman.exe) program that can be used during logon screen with Command Prompt (cmd.exe), so you can access Command Prompt from the login screen and reset your Windows 7 password quickly. Follow these steps:
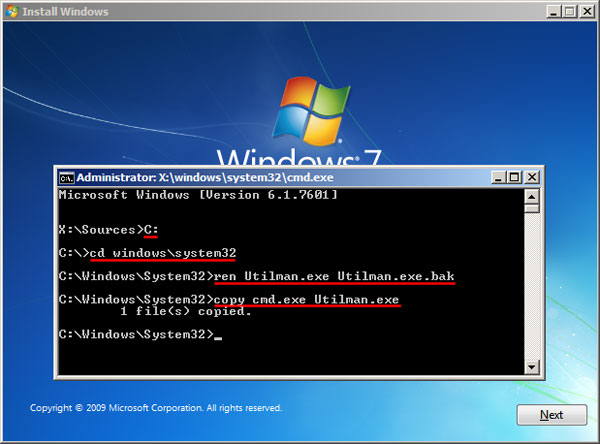
Boot your computer from Windows 7 installation disk. When the Install Windows screen appears, press SHIFT + F10 keys to open the Command Prompt.
Type in the following commands. Replace C: with the drive where your Windows 7 system was installed.
C:
cd windows\system32
ren Utilman.exe Utilman.exe.bak
copy cmd.exe Utilman.exe
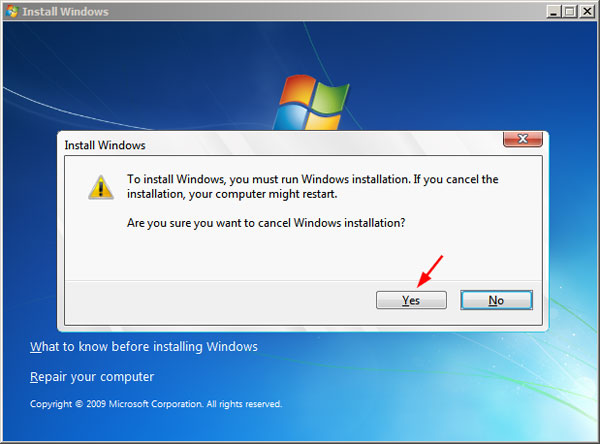
That's all we need to do here. Close the Command Prompt and the Install Windows dialog to restart you computer.
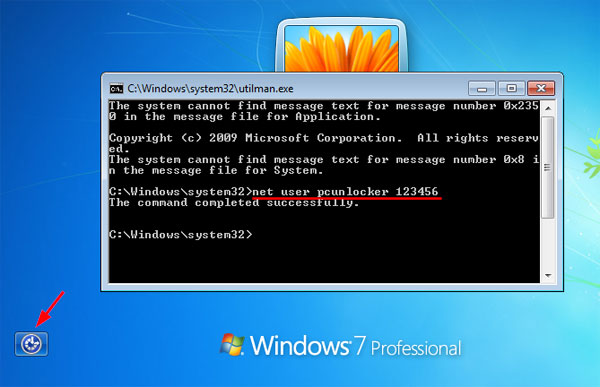
Let the Windows 7 boots normally this time. At login screen click the Ease of Access icon, it will launch the Command Prompt window. You can then run the following command to reset your forgotten password.
net user username new_password
Close the Command Prompt and you can use the new password to log in. Don't forget to restore the original Utilman.exe file back.
select advance options
choose command
type d:
type dir
type cd d:\windows\system32\config
type md backup
type copy *.* backup
type cd regback
type copy *.* ..
type a
type exit
turn off PC
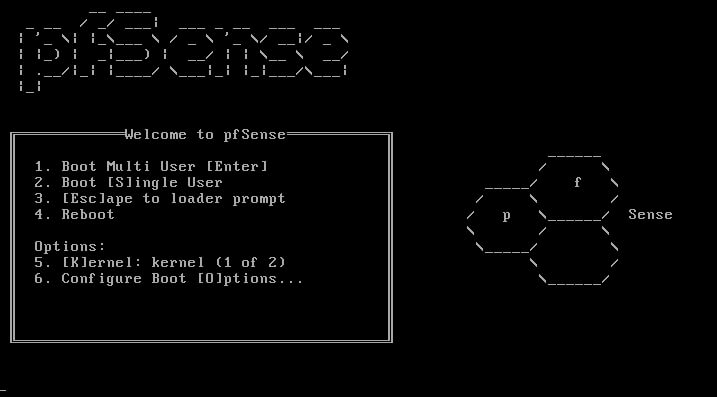
1. Select target machine, place pfSense CD/DVD or USB stick and set the BIOS options to your booting method (CD/DVD or USB) according to your choice and choose the boot options by pressing a keyboard function keys, usually F10 or F12, pfSense will start booting….
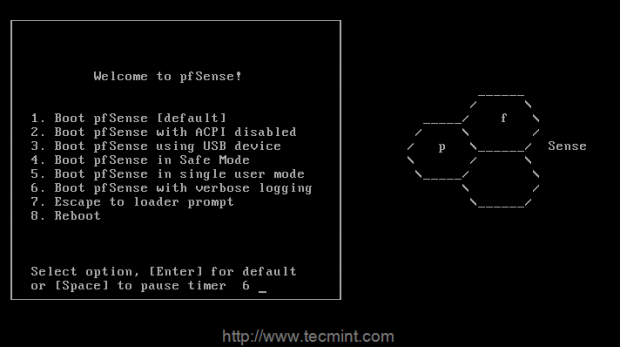
2. As the pfSense starts booting, a prompt is displayed with some options and a countdown timer. At this prompt, press 1 to get install pfsense by default. If we don’t choose any option it will start to boot option 1 by default.
3 Next, press ‘I‘ to install fresh copy of pfsense, If we need to start a recovery use R, to Continue using Live CD choose C within 20 seconds count.
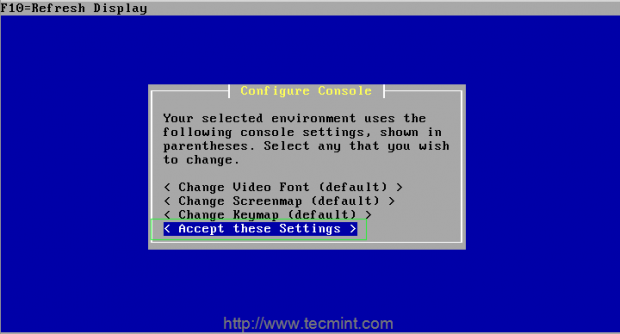
4. On the screen, it will ask you to ‘Configure Console‘, just press ‘Accept these settings‘ to move forward for installation process.
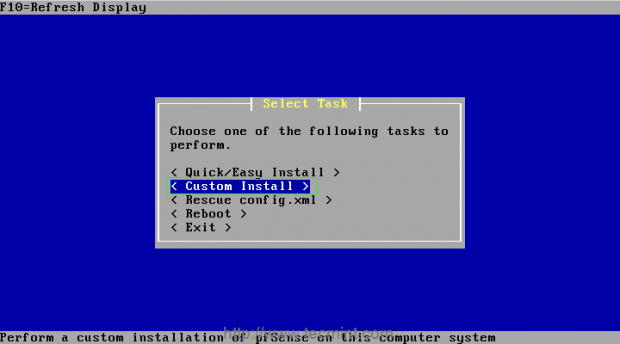
5. If you’re new to pfsense, choose ‘Quick/Easy Install‘ option to take make things easier or choose ‘Custom Install‘ to get advance options during installation process (recommended for advance users).
pfSense Configuration
After the reboot, and the removal of the CD/USB media, pfSense will reboot into the newly installed operating system. By default, pfSense will pick an interface to set-up as the WAN interface with DHCP and leave the LAN interface unconfigured.
pfSense Interface Configuration
While pfSense does have a web based graphical configuration system, it is only running on the LAN side of the firewall but at the moment, the LAN side will be unconfigured. The first thing to do would be to set an IP address on the LAN interface.
To do this follow these steps:
Take note of which interface name is the WAN interface (em0 above).
Enter ‘1’ and press the ‘Enter’ key.
Type ‘n’ and press the ‘Enter’ key when asked about VLANs.
Type in the interface name recorded in step one when prompted for the WAN interface or change to the proper interface now. Again this example, ‘em0’ is the WAN interface as it will be the interface facing the Internet. use usable ip next to ip of gateway
The next prompt will ask for the LAN interface, again type the proper interface name and hit the ‘Enter’ key. In this install, ‘em1’ is the LAN interface.
pfSense will continue to ask for more interfaces if they are available but if all interfaces have been assigned, simply hit the ‘Enter’ key again.
pfSense will now prompt to ensure that the interfaces are assigned properly.
pfSense Network Interfaces
If the interfaces are correct, type ‘y’ and hit the ‘Enter’ key.
The next step will be to assign the interfaces the proper IP configuration. After pfSense returns to the main screen, type ‘2’ and hit the ‘Enter’ key. (Be sure to keep track of the interface names assigned to the WAN and LAN interfaces).
*NOTE* For this install the WAN interface can use DHCP without any problems but there may be instances where a static address would be required. The process for configuring a static interface on the WAN would be the same as the LAN interface that is about to be configured.
Type ‘2’ again when prompted for which interface to set IP information. Again 2 is the LAN interface in this walk through.
pfSense Available Interfaces
When prompted, type the IPv4 address desired for this interface and hit the ‘Enter’ key. This address should not be in use anywhere else on the network and will likely become the default gateway for the hosts that will be plugged into this interface.
pfSense IP Address
The next prompt will ask for the subnet mask in what is known as prefix mask format. For this example network a simple /24 or 255.255.255.0 will be used. Hit the ‘Enter’ key when done.
pfSense Network Subnet Mask
The next question will ask about an ‘Upstream IPv4 Gateway’. Since the LAN interface is currently be configured, simply hit the ‘Enter’ key.
pfSense Network Gateway
The next prompt will ask to configure IPv6 on the LAN interface. This guide is simply using IPv4 but should the environment require IPv6, it can be configured now. Otherwise, simply hitting the ‘Enter’ key will continue.
pfSense IPv6 Address
The next question will ask about starting the DHCP server on the LAN interface. Most home users will need to enable this feature. Again this may need to be adjusted depending on the environment.
This guide assumes that the user will want the firewall to provide DHCP services and will allocate 51 addresses for other computers to obtain an IP address from the pfSense device.
pfSense DHCP Configuration
The next question will ask to revert pfSense’s web tool to the HTTP protocol. It is strongly encouraged NOT to do this as the HTTPS protocol will provide some level of security to prevent disclosure of the admin password for the web configuration tool.
pfSense HTTP Protocol
Once the user hits ‘Enter’, pfSense will save the interface changes and start the DHCP services on the LAN interface.
pfSense Interface URL
Notice that pfSense will provide the web address to access the web configuration tool via a computer plugged in on the LAN side of the firewall device. This concludes the basic configuration steps to make the firewall device ready for more configurations and rules.
The web interface is accessed through a web browser by navigating to the LAN interface’s IP address.